Shopping list
- 4 – fence pickets, ⅝″ × 5½″ × 6 ft
- 1¼″ exterior brad nails or screws
- Titebond III (waterproof)
- Cedar timber oil for the body
- Matte black exterior stain for the legs and trim
Tools
Miter or circular saw · Table saw (ripping legs) · Brad nailer · Square · Tape measure
Cut list
| Part | Qty | Size |
|---|---|---|
| Wall slats (long)front and back | 6 | 16″ |
| Wall slats (short)left and right | 6 | 15″ |
| Legs, narrow sideripped from picket | 4 | 1½″ × 24″ |
| Legs, wide sideripped from picket | 4 | 2″ × 24″ |
| Ledgers / cleatsfrom offcuts | 4–8 | ≈ 14–15″ |
| Floor slatsfrom offcuts | 3–4 | ≈ 15″ |
| Top trim (optional) | 4 | miter to ≈ 17″ |
Step-by-step
Step 1Break down the pickets
From 2 pickets, cut six 16″ slats and six 15″ slats.
From the other 2, cut four 24″ pieces and rip into four 1½″ strips and four 2″ strips. Save offcuts for ledgers and floor slats.
Step 2Build the corner legs
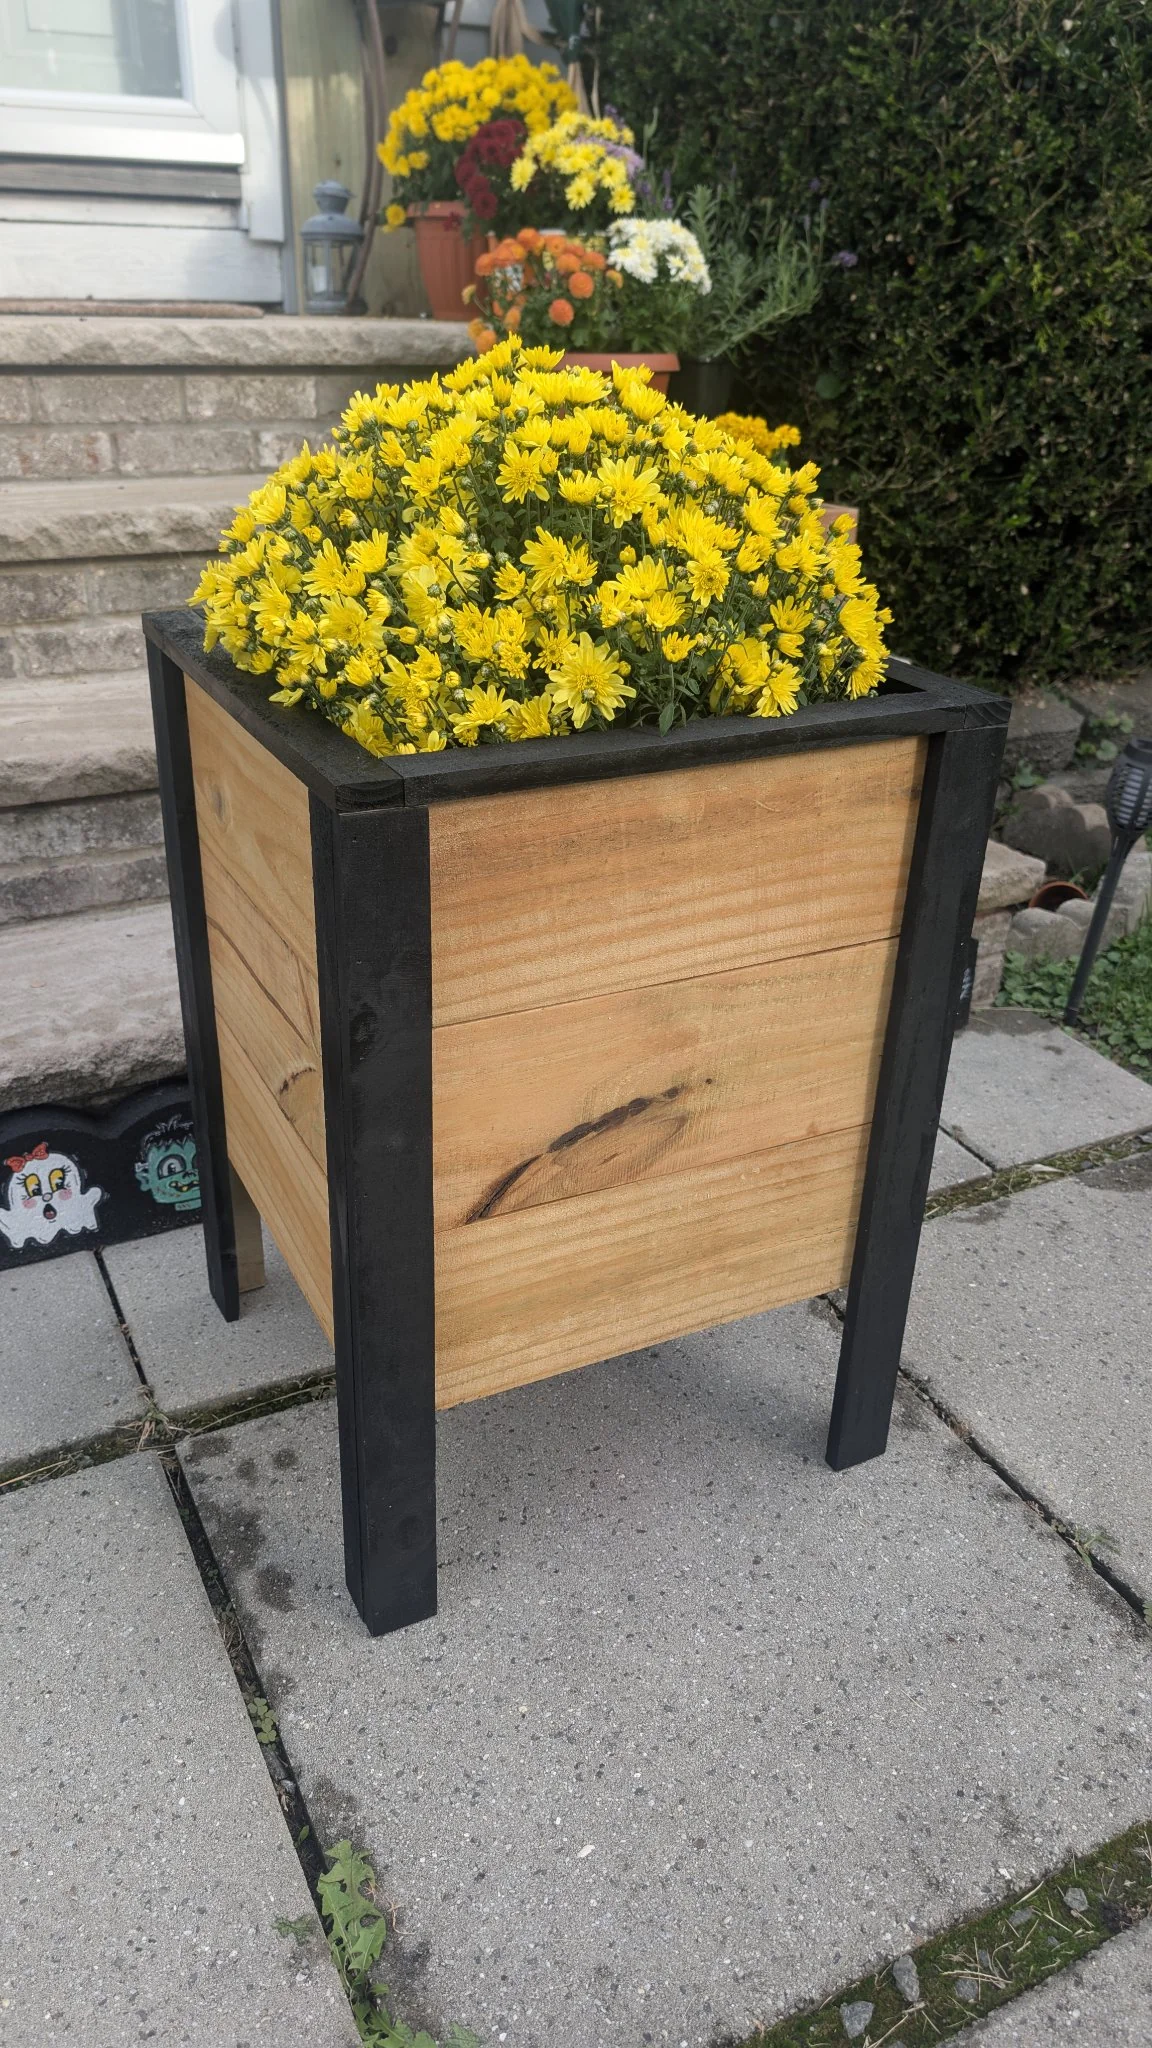
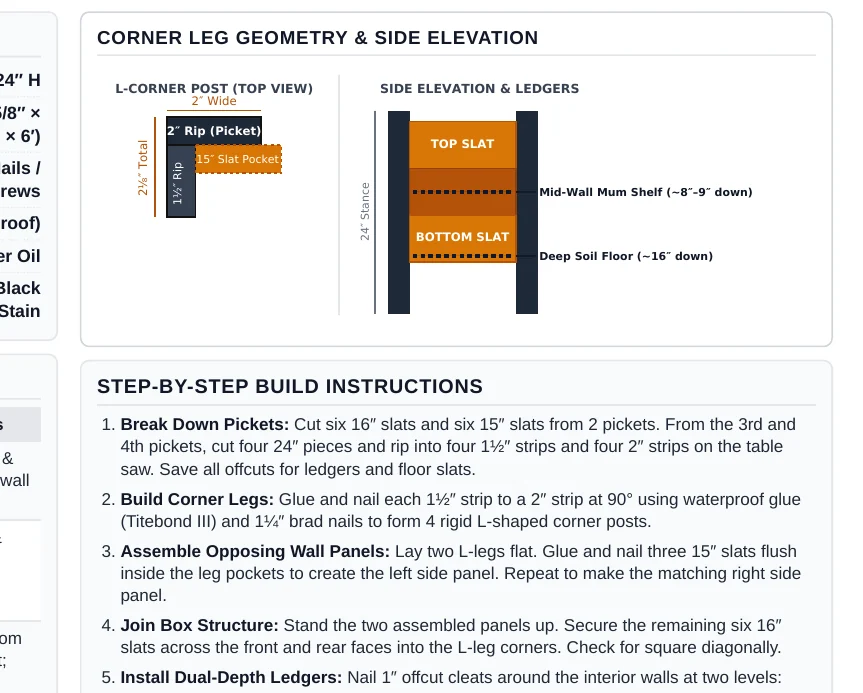
Glue and nail each 1½″ strip to a 2″ strip at 90° to make 4 L-shaped corner posts.
Step 3Assemble the side panels
Lay two L-legs flat. Glue and nail three 15″ slats inside the leg pockets to make one side. Repeat for the other side.
Step 4Join the box
Stand both panels up and fasten the six 16″ slats across the front and back into the L-leg corners. Check for square.
Step 5Install the dual-depth ledgers
Mid-wall mum shelf about 8–9″ down holds standard 2–3 gallon nursery pots.
Bottom cleat about 16″ down for full-depth soil. Drop in floor slats with ¼″ drainage gaps.
Finishing
Pre-finish before assembly: stain the 12 wall slats natural cedar and the 8 leg pieces matte black. You get crisp lines with no taping.
Check your actual picket thickness before cutting and follow standard shop safety.