Shopping list
- 2 – straight, dry 2×4 @ 8 ft (clean, untreated)
- ¼″ wood dowel
- Titebond III
- Three paint colors + stain for the stems
- Jute twine
Tools
Miter saw · Table saw with guard and push aids · Router + 45° chamfer bit · Clamps · Drill + ¼″ bit · Belt/orbital sander · Eye, ear and dust protection
Cut list
| Part | Qty | Size |
|---|---|---|
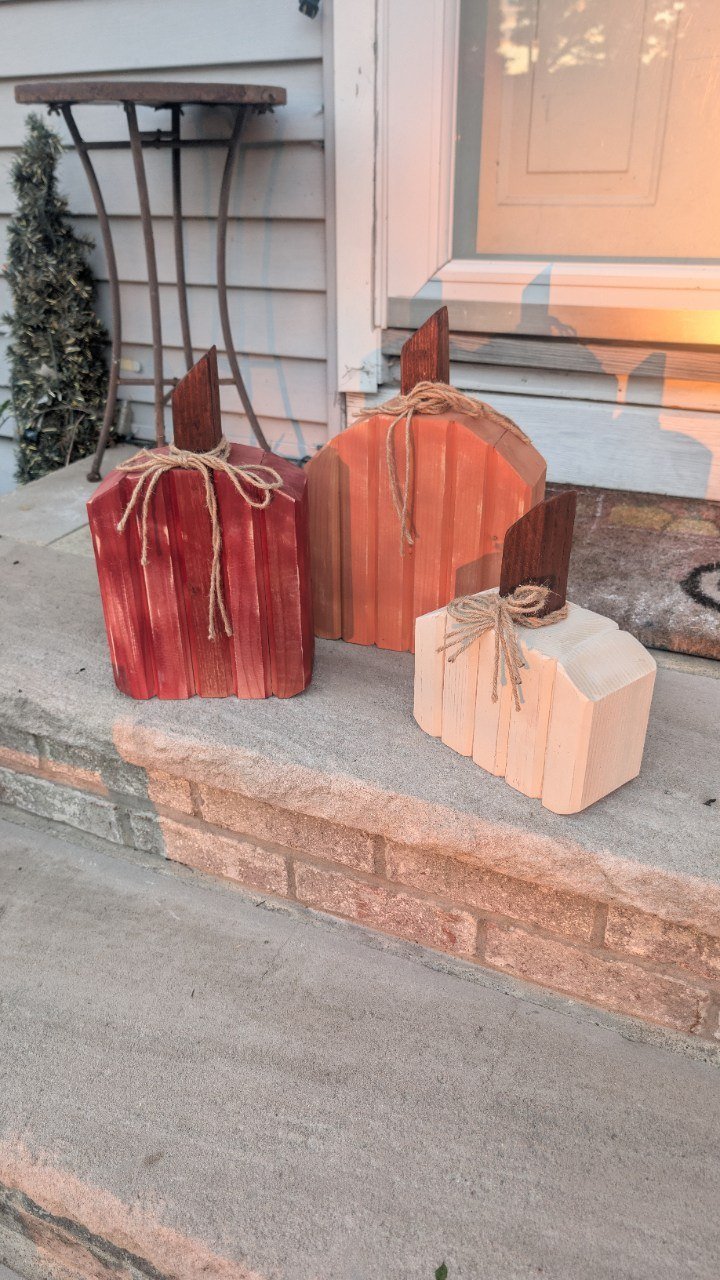
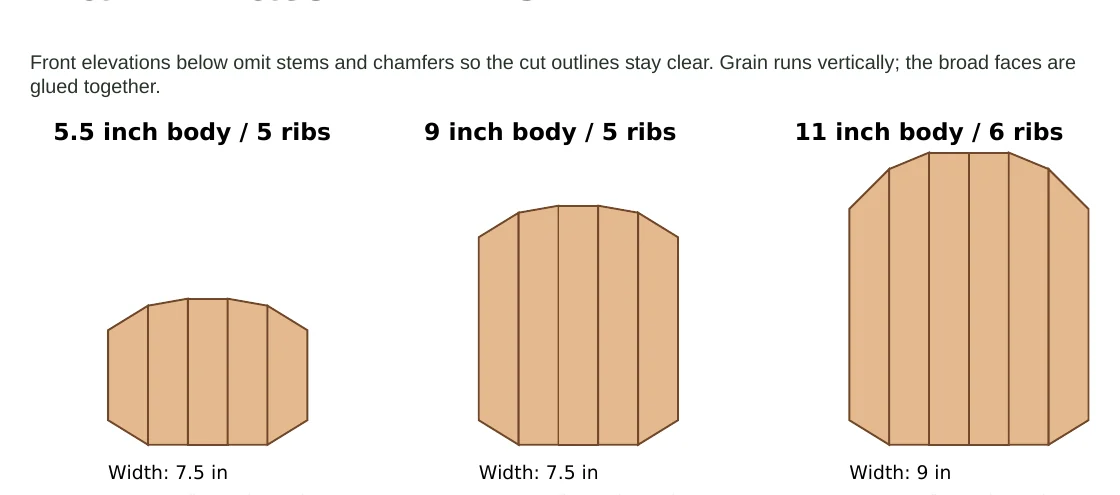
| Small body piecesbody width 7½″ | 5 | 5½″ |
| Medium body piecesbody width 7½″ | 5 | 9″ |
| Large body piecesbody width 9″ | 6 | 11″ |
| Stemsripped from a 12″ section | 3 | ≈ 2½″ |
Step-by-step
Step 1Cut the blanks
Board 1: six 11″ blanks and three 9″ blanks.
Board 2: two 9″ blanks, five 5½″ blanks and one 12″ section for stems.
Narrow 1½″ faces point forward; body depth is 3½″.
Step 2Shape the small and medium bodies (5 pieces)
Leave the center piece full height with a square top.
Cut the two neighboring tops at 10°, descending outward. Mirror left and right.
Stand all pieces on the same baseline, mark each neighbor’s low point onto its outer piece, and cut each outer top at 31.6° from that mark.
Step 3Shape the large body (6 pieces)
Leave both center pieces 11″ tall with square tops.
Neighboring tops descend at 22.5°. Transfer their low points to the outer pieces and cut those at 45°. Mirror both sides.
Step 4Bottom cuts
Cut a 31.6° bottom miter across the full 1½″ width of each outside rib, rising toward the outside edge.
Leave interior ribs flat. Use a holding jig for short pieces; never put fingers near the blade.
Step 5Chamfer, dry-fit, glue
Chamfer the front and back edges of every piece with a 45° bit. Keep the mating faces flat.
Dry-fit on a flat surface, then glue with Titebond III and clamp. Once cured, round the outline on a belt sander.
Step 6Stems and dowels
Rip the 12″ section into narrow strips and cut three stems about 2½″ long with a 45° top.
Drill a ¼″ hole in the pumpkin top and the stem bottom, then glue in a dowel cut slightly shorter than both holes combined.
Step 7Paint, distress, tie
Paint the bodies in fall colors and stain the stems. Lightly sand edges to distress.
Tie jute bows. Check the base is stable and the stems are solid.
Check your actual lumber dimensions. Decorative item, not a toy. Protect from standing water.
Build inspiration: WhosTheVoss. Instructions and diagrams by PS Custom Woodcrafts.