Shopping list
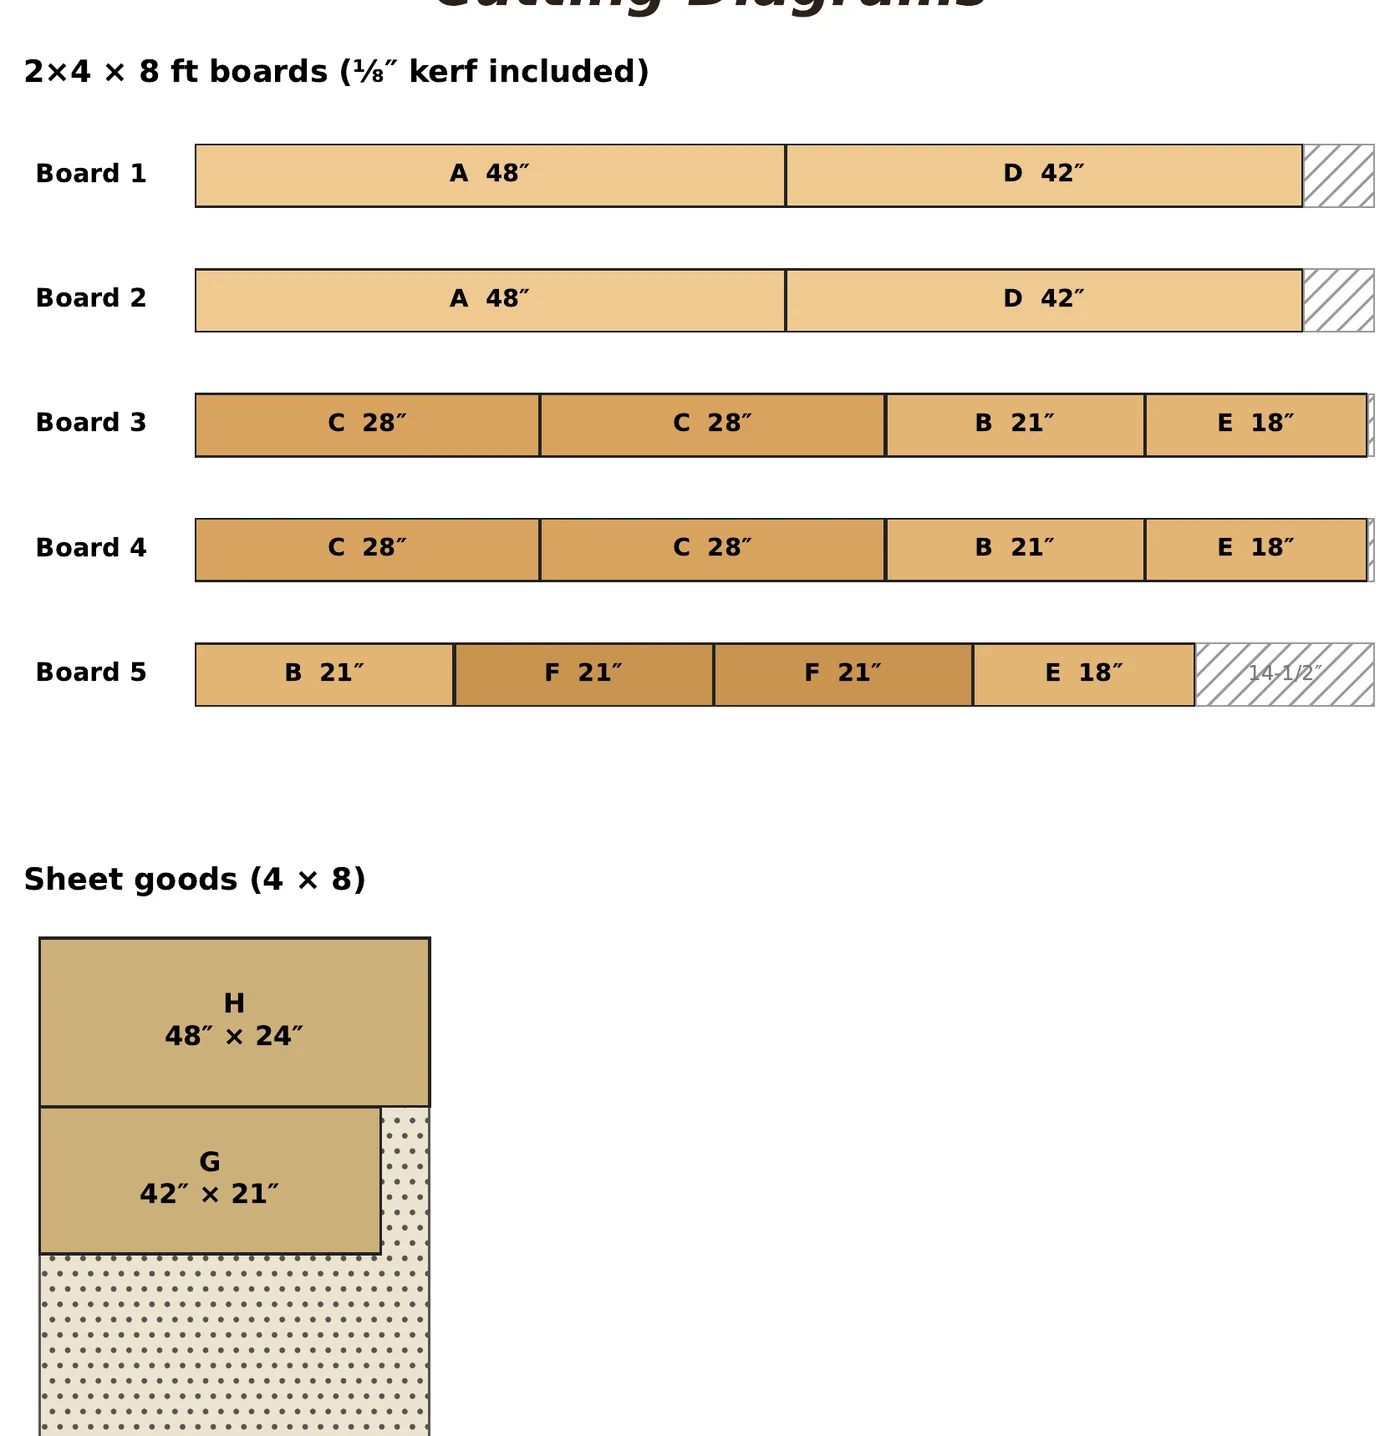
- 5 – 2×4 @ 8 ft (pick the straightest)
- 1 – sheet ¾″ OSB, 4×8 (top and shelf both come from one sheet)
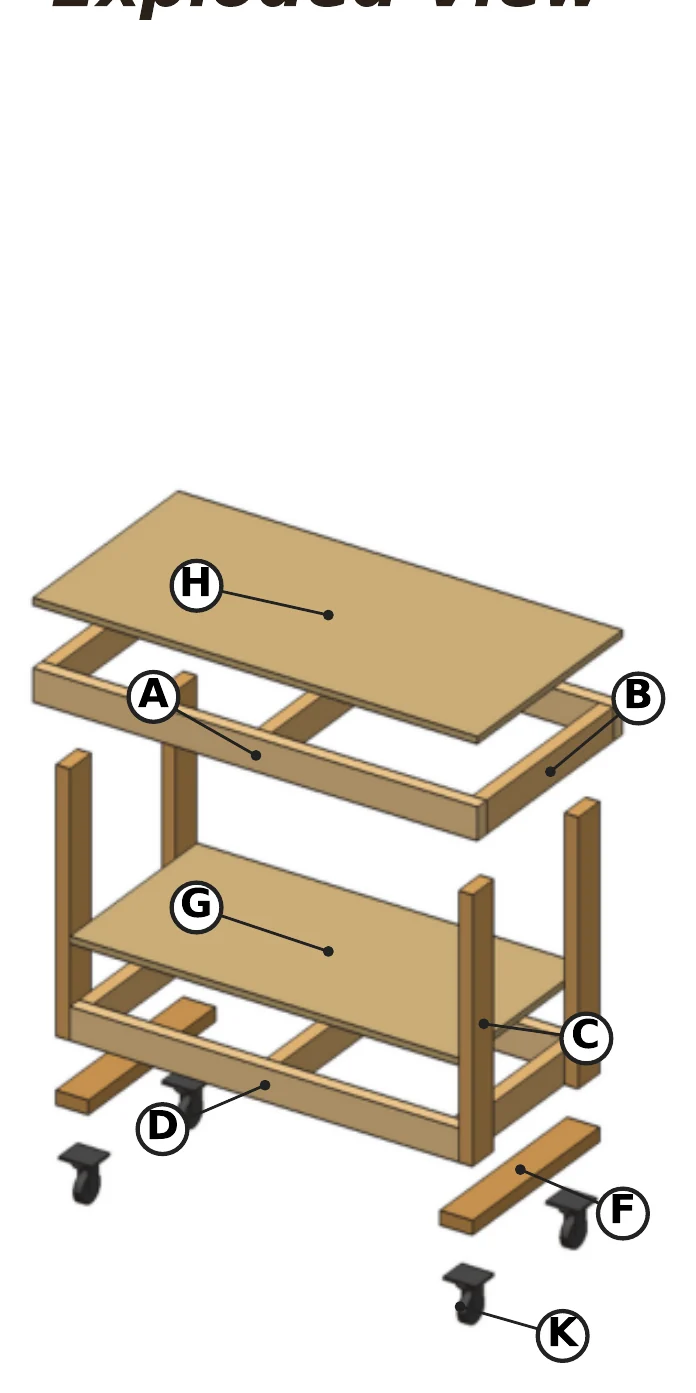
- 4 – casters, about 5″ tall, 2 locking + ¼″ lag screws or bolts
- 3″ structural screws, 1¼″ screws for the sheet goods
- Wood glue
Tools
Circular or miter saw · Drill/driver · Pocket hole jig · Countersink bit · Square · Tape measure · Clamps · Sander (80/120)
Cut list
| Part | Qty | Size |
|---|---|---|
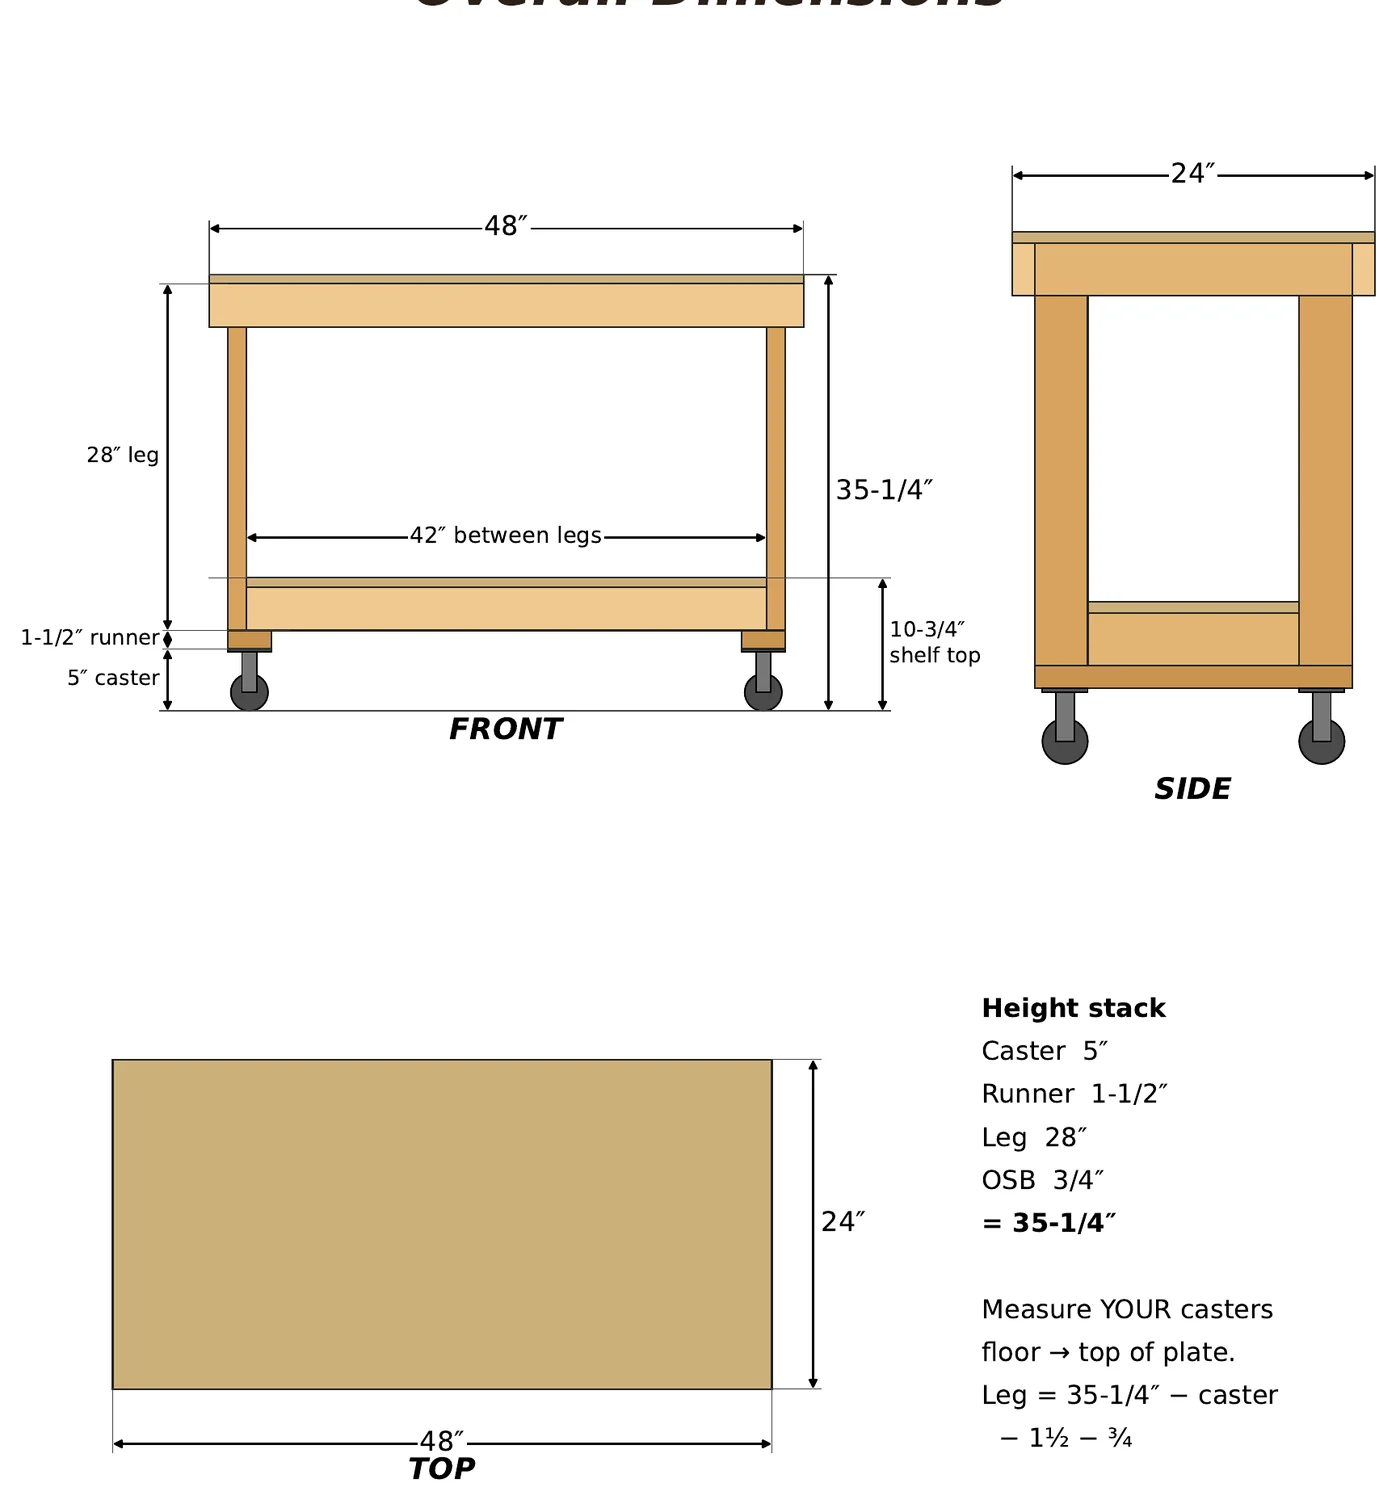
| A – Top long rail | 2 | 48″ |
| B – Top end / center rail | 3 | 21″ |
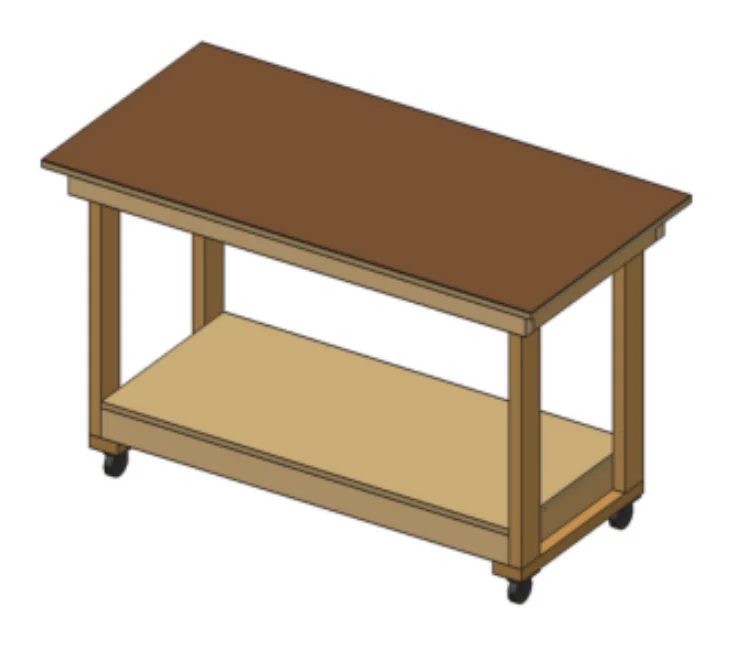
| C – Legwith 5″ casters | 4 | 28″ |
| D – Bottom long rail | 2 | 42″ |
| E – Bottom stretcher | 3 | 18″ |
| F – Caster runner (on flat) | 2 | 21″ |
| G – Lower shelf (OSB) | 1 | 21″ × 42″ |
| H – Worktop (OSB) | 1 | 24″ × 48″ |
Step-by-step
Step 1Leg + runner assemblies
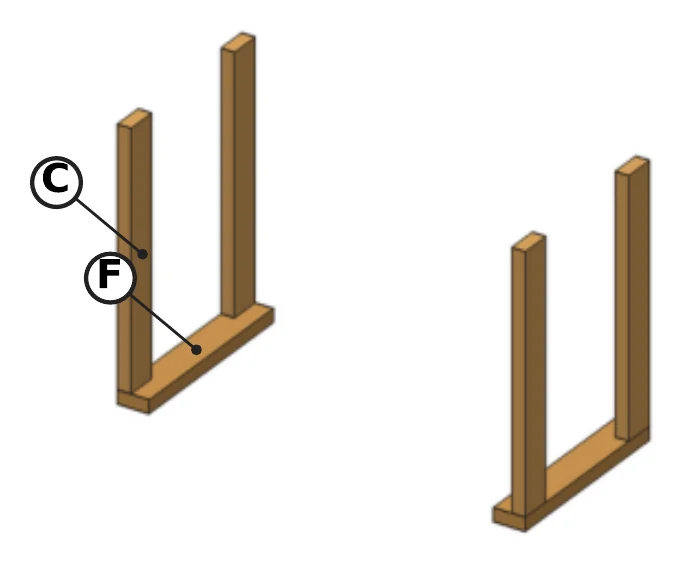
Make two assemblies: two C legs standing on one F runner (on flat).
Legs flush with the runner ends and outside edges. The 3½″ leg face runs the same direction as the runner.
Pocket holes and glue, leg into runner. Check each leg is square to the runner.
Step 2Build the top frame
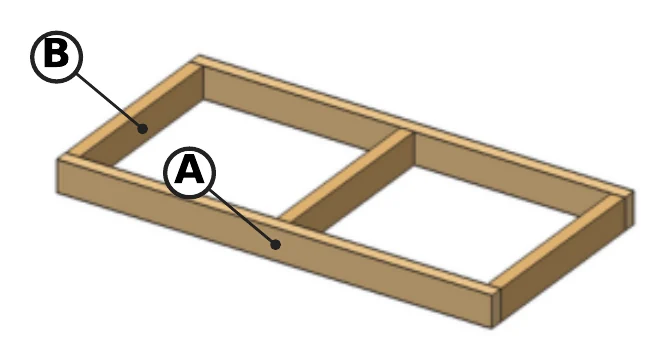
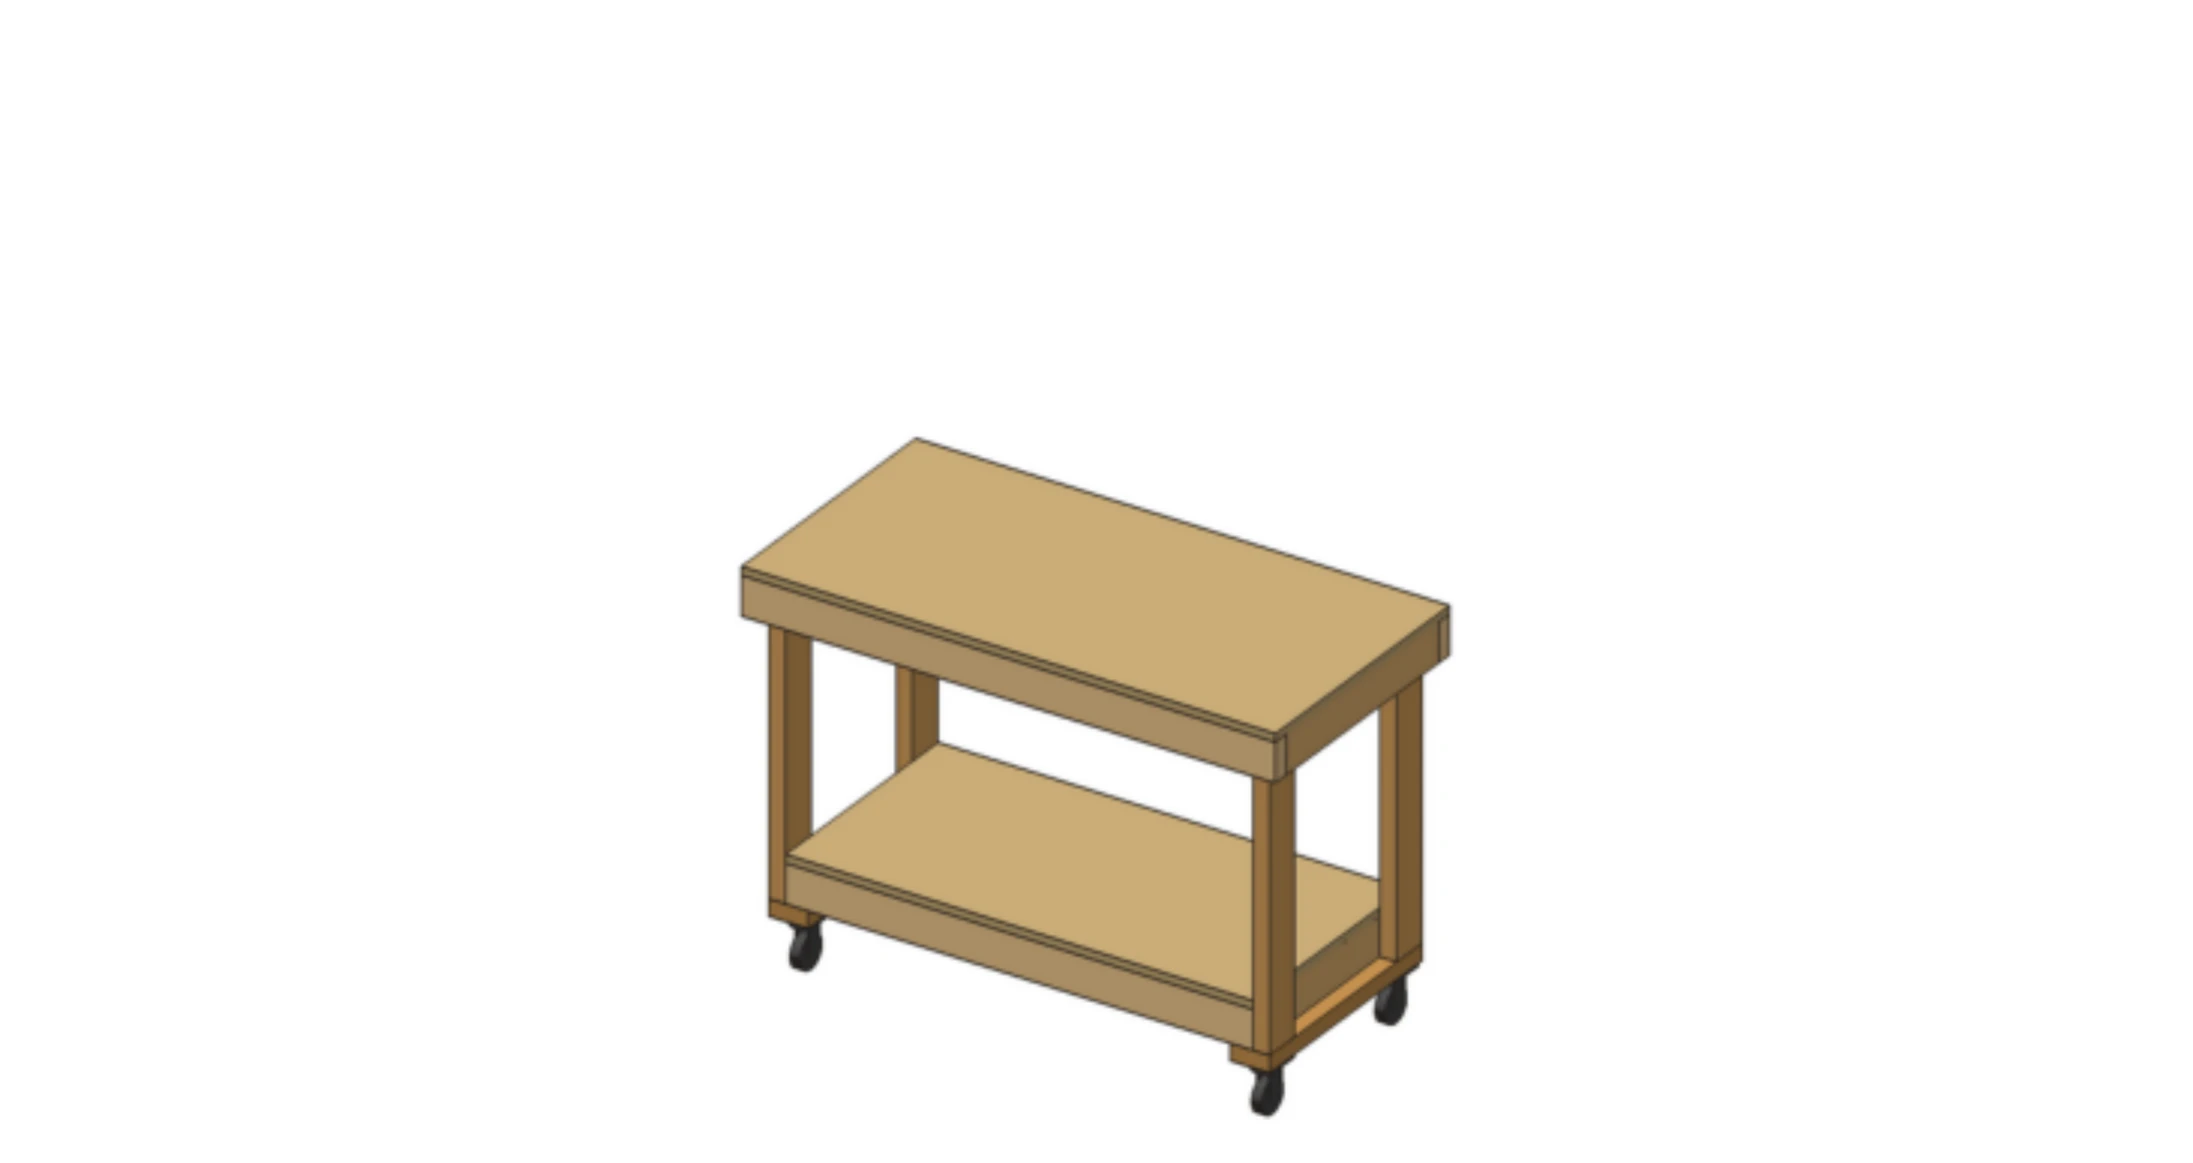
Lay the two A rails (48″) on edge and fit three B rails (21″) between them: one at each end, one centered 23¼″ from either end.
Glue and pocket screws, or two 3″ screws through A into each B.
Check: outside is 48″ × 24″ and the diagonals are equal.
Step 3Build the bottom frame
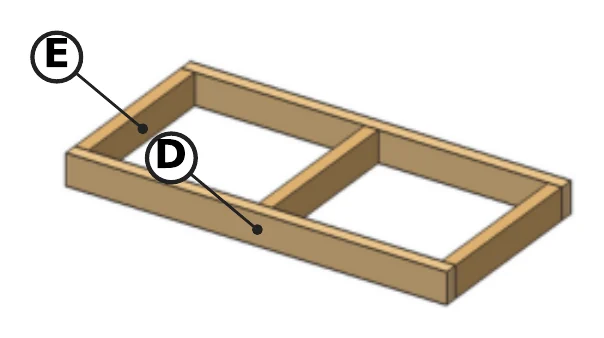
Fit three E stretchers (18″) between the two D rails (42″): one at each end, one centered.
Glue and pocket screws. Check: outside is 42″ × 21″ and the diagonals are equal.
Step 4Bottom frame to the leg assemblies
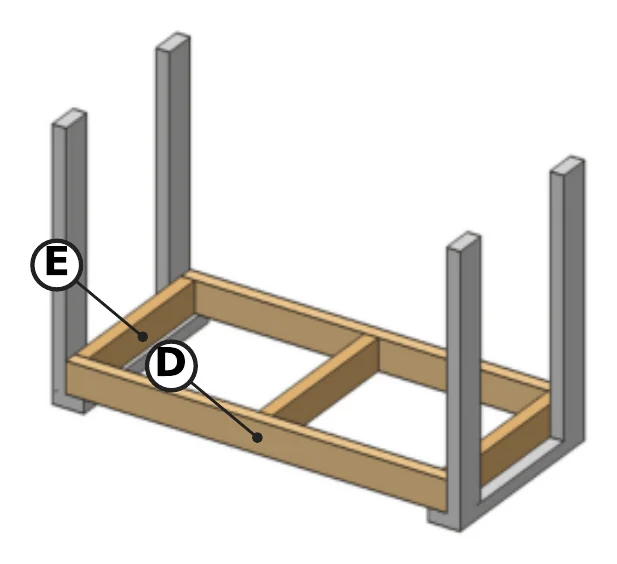
Set the bottom frame between the two leg/runner assemblies. It sits directly ON the runners, between the legs.
D rails flush with the outside faces of the legs.
Glue and screw through the legs into D and down through E into F, or pocket screw from inside the frame.
Step 5Top frame onto the legs
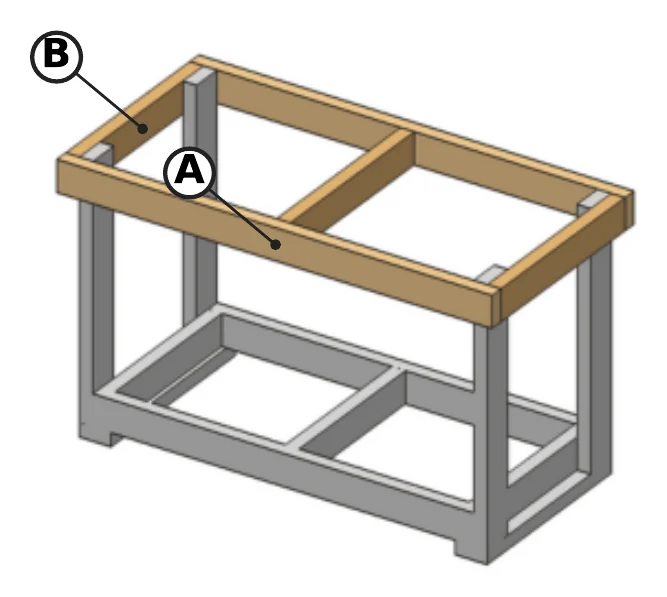
Set the top frame over the legs. Each leg nests inside a corner: 3½″ face against the end rail, 1½″ edge against the long rail.
Leg tops dead flush with the top of the frame so the worktop sits flat on both.
Glue and 3″ screws through A and B into each leg.
Step 6Casters
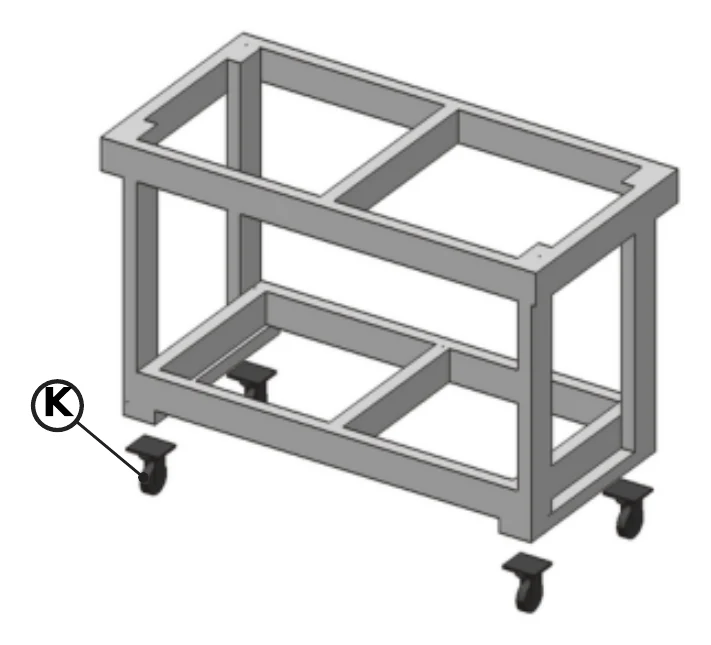
Do this before the sheet goods. The bench is easy to flip now and heavy once the OSB is on.
Flip the bench upside down. Bolt or lag a caster to each runner end, centered under the leg. Locking casters on the front.
Flip it upright onto the casters.
Step 7Attach the worktop
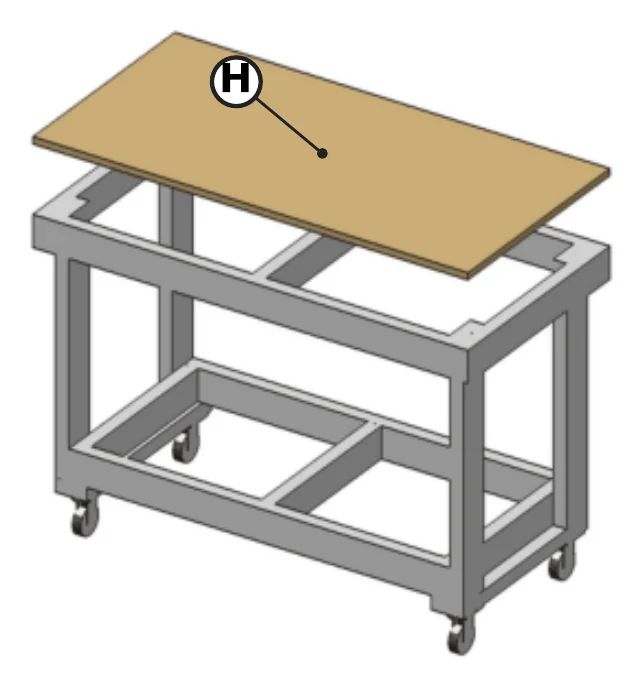
Set H (24″ × 48″) on the frame, flush on all four sides.
Glue and 1¼″–1⅝″ screws every 8″ into the rails and leg tops. Countersink every screw just below the surface.
Ease all edges with 120 grit.
Step 8Lower shelf
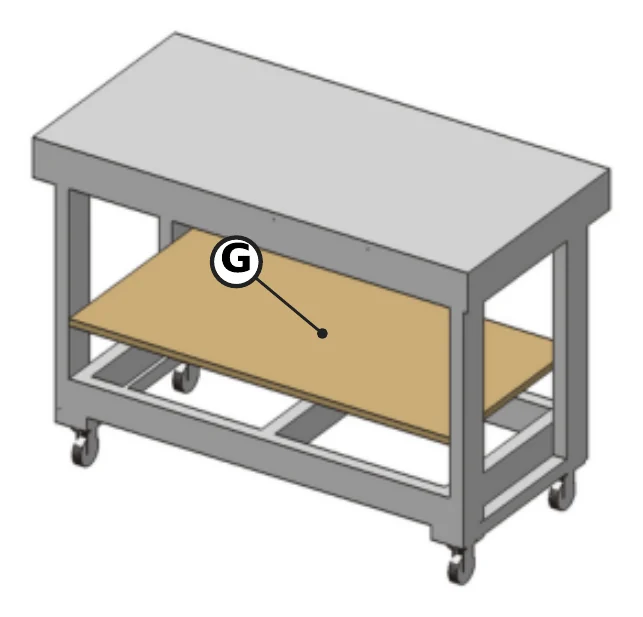
Slide G (21″ × 42″) in from the front, between the legs, onto the bottom frame. It fills the 42″ gap exactly; if it binds, sand one end.
Glue and 1¼″ screws down into D and E.
Check: floor to top = 35¼″.
Finishing
Optional: brush 2 thin coats of water-based polyurethane on the top and all OSB edges. Scuff with 220 between coats.
Edges soak up the most moisture, so give them an extra coat.
Measure your casters (floor to top of the mounting plate) before cutting legs: leg = 35¼″ − caster − 1½″ − ¾″. Check your actual lumber sizes. Follow your tool manuals and standard shop safety.